 |

| Labor: |
 |
 |
 |
| FC3S Pro Battery Relocation | |
|---|---|
 |
Wiring diagram for additional wiring
Please note 2AWG minimum wire thickness; this is for minimum safe 100 ampere current flow through 20 feet of cable length. Cheapest and easiest place to get large diameter wire like this is from welding supply shops. Welding cable is very economical and very flexible - ideal for use in the automotive environment. Two circuit breakers are used to protect both the battery and alternator against shorting. We recommend anything over 100 ampere circuit breaker rating. We typically use Phoenix Gold 150A circuit breakers. Fuses can be substituted but use at least 150 ampere rated fuses. Parts list: |
 |
Diagram for battery box installation
Please note all fasteners are minimum 5/16"" stainless steel. Stainless steel is used for acid resistance in case battery acid is spilled. These battery boxes are easily found in K-Mart or Wal*Mart stores. Wal*Mart stocks these in their battery display stand, while K-Mart has them located in the boating / marine aisles. We've also found them readily available from Kragens, so any Kragen / Schucks / Checkers (and all large-chain auto parts stores) should sell them. They are regularly used for boating applications. Parts list: |
 |
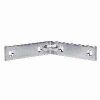
Stanley L-bracket
We use Stanley brand L-brackets from Home Depot. You can use any equivalent bracket. The bracket has a 90° bend in it with 4" legs. The holes that are going to have bolts going through them need to be drilled out slightly. The 5/16" thread diameter bolts are slightly larger than the holes already made in the bracket. We will need to bend one leg of the bracket to contour to the back of the compartment wall rear slope. This is done by trial and error. Bending one leg at the inner hole makes bending the bracket easier. McMaster-Carr http://www.mcmaster.com/ sells them singly. McMaster-Carr part number: 1556A17 McMaster-Carr description: Steel Corner Brace Zinc-Plated, 4" Length Of Sides, 7/8" Width McMaster-Carr price: $1.16 |
 |
Brackets mounted on battery box
L-brackets are bent and installed on the battery box. |
 |
Passenger-side compartment drilled
After removing storage compartments, carpet, and black fiberglass frame, the chassis is exposed. We have drilled four holes indicated by the yellow arrows. Be very careful about drilled through the chassis! Kouki models have extra brake lines running underneath! |
 |
Front, inner bolt fastened from underneath
Shown from underneath, yellow arrow points to nut that secure the front, inner bolt that holds down battery box. Having a friend help you with this will make the job go easier. The fastener is directly above a rear cross-member, and space is very tight. |
 |
Front, outer bolt fastened from underneath
Shown from underneath, yellow arrow points to nut that secure the front, outer bolt that holds down battery box. Having a friend help you with this will make the job go easier. The fastener is directly above a rear cross-member, and space is very tight. |
 |
Both rear bolts from underneath
Both rear bolts that secure rear brackets are shown from underneath the vehicle chassis. Note: bolts shown are 1.5" long; 1" bolts should not extend as far. Kouki FC3S chassis have extra brake lines in this area, so be very careful when drilling these holes! |
 |
Rear circuit breaker behind seats
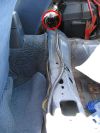
Moving from rear to front, the rear circuit breaker is shown securely fastened to the cross frame the runs right behind the seats. Wire length from positive (+) battery terminal to the (rear) circuit breaker should not be more than 18-inches. Refer to the wiring diagram at the top of this table for reference. Rear circuit breaker is shown in the red circle. |
 |
Power cable along cross member
After the rear circuit breaker, power wire snakes across the cross member to the driver's side of the vehicle. Notice the nylon wire ties that secure the cable to the cross member to minimize movement; try to secure the cable as much as possible to prevent chafing of the cable insulation to surrounding areas. In case of an accident, this keeps the power cable in place instead of causing a possible electrical short! Rear circuit breaker is shown in the red circle. |
 |
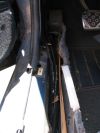
Power cable running down driver's side door sill
Once across the cross member, the power cable can be now run down along the driver's side door sill. The tricky part is to get around the seat belt anchor that's to the rear of the door sill. You might have to remove the bolt that anchors the seat belt to run the cable properly. There should be a masonite / hardboard panel that is secured by a number of plastic pop rivets. You can remove the rivets to pop the panel off, which should allow you to run the power cable underneath. |
 |
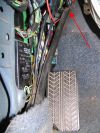
Driver's side kickpanel area
Removing the plastic kickpanel will reveal this area. The power cable can be run all the way forward to here and then upwards aiming for the firewall area where the main power harness snakes through. Although tight, there's a surprising amount of room! I had no problem getting the 1/0-AWG thick power cable to make it through. It would help to make a slice in the rubber boot so that the power cable can pass through easier! Red arrow shows 1/0-AWG cable entering rubber grommet in the firewall from under dashboard. |
 |
Final stop - engine bay
Secure the front circuit breaker and snake the power cable to it. My circuit breaker is located on the shock tower. On the other end of the front circuit breaker, the two wires that were previously connected to the positive (+) battery terminal have been reterminated with a new connector and secured. The battery ground that use to be connected to the negative (-) battery terminal is now grounded to the chassis; other miscellaneous grounds are now connected to this new ground point. The ground "lug" is sourced from Home Depot. Front circuit breaker shown in red circle. New ground point shown in blue circle. |