| FC3S Pro - Power Window Rebuild |
|---|
 |
Shot of inside of passenger door with door panel removed
(I'm assuming that most people can remove the door panels. I currently
do not have a write-up for the door panel procedure, but I might add this
shortly.)
Circled in yellow: Passenger-side power window switch removed from door
panel and plugged back in; you'll need some way to raise / lower window.
Circled in red: Connector for power window motor.
Circled in green: End of guide tube snaked from power window motor for
bead linkage.
I have ripped off most of the clear plastic liner that normally covers the
entire inside of the door.
Most of it has deteriorated into dust due to the age the vehicle and sitting
in the sun a lot. |
 |
Close-up of door |
 |
Close-up of bead linkage end with window completely down
Here we see the spring with crimped end sticking OUT of the guide tube.
I'm not too sure if this was the original design, but the guide tubes now
measure 18" on my 1987 Turbo II.
Notice all the crap that comes out of the end - some of it also ends up on the
door panels too. |
 |
Removing the glass
I've dropped the window glass about half-way.
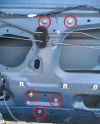
You'll notice two 10mm bolts with Phillips heads that secure the window glass.
These bolts are now lined up with access holes.
Red circles indicate that the bolts are now accessible.
I recommend using a socket + extension + ratchet to remove these bolts.
You could use a Phillips screwdriver, but be careful not to slip and crack the
glass! |
 |
Close-up view of bolts for window glass |
 |
Remove window glass
Once the two bolts are removed, the window glass is now free.
This is a good time to wash your hands to keep the window glass as clean as
possible.
Also, some gloves can help with handling the window glass.
The window glass edges are all ground down with no sharp edges, but gloves
can't hurt here.
I find it easier to tilt the front downward and raise the rear upwards.
You might need to drop the power window (support bracket with no glass) all
the way to the bottom for clearance and ease of removal.
Please keep window glass in a nice safe place after removal. |
 |
Fastener locations for the power window bracket assembly
Prior to starting this step, hit the window switch like you're raising the
window to it's highest / closed position.
The 5 red circles show the positions of the 5 fasteners that secure the power
window assembly.
The top two are flanged nuts, while the bottom 3 are bolts.
All are 10mm. |
 |
Disconnect power window motor wiring connector
If you haven't done this by now, hit the window switch do that the window
would be in the highest / closed position.
Once the 2 nuts and 3 bolts are removed, the assembly should be loose.
We just need to disconnect the wiring connector to free the entire unit.
Power window motor wiring connector circled in RED. |
 |
Remove the power window assembly
Gently manuever the assembly toward the rear of the door.
We're trying to position the freed assembly to be removed from the largest hole
in the door.
You can pop the linkages going across the door from their catches to aid in
this step.
Once you've got the power window assembly like shown in the pic, you're almost
there! |

 |
Power window assembly fully removed
Front and rear pics of the power window assembly removed from vehicle (door). |
 |
Remove clamp for guide tube
Remove the hose clamp that secures the vinyl hose guide tube.
I used a Vice Grip pliers in this case, but anything similar can work.
Hose clamp circled in RED. |
 |
Original vinyl guide tube removed
Clamp and vinyl hose guide tube removed.
RED circles show removed hose clamp and the original position where it came from. |

 |
Remove 7mm bolt that secures metal guide cover
There is a single 7mm bolt that secure the metal guide cover.
7mm bolt circled in RED.
The bolt head is very close to the metal guide cover "wall", so I could only
use an open-end wrench to access it; most sockets will not fit in there.
The bolt can be seized pretty good - luckily, you can access the backside /
threads of the bolt by flipping everything over.
Once flipped over, you will see a partial hole - circled in BLUE.
Shoot some of your favorite spray penetrant and let it soak for a while.
This should help loosen a stubborn, seized 7mm bolt.
Once the 7mm bolt is removed, the cover is held into place by a plastic stud
which secured the other end of the metal cover.
White plastic stud circled in YELLOW.
Carefully pry to remove.
Entire metal cover circled in GREEN. |
 |
Snap ring removal
We'll need to remove the snap ring that secures the pulley that powers the
bead linkage up and down.
This is an OUTSIDE or EXTERNAL snap ring, so we need the appropriate snap ring
pliers for this job.
Some (spray) penetrant can help with this removal, since crud can hinder removal
of the pulley off the motor.
Snap ring circled in YELLOW. |
 |
Pulley removed
With snap ring removed, gently pry the pulley off the spindle.
Keep in mind that the pulley is made out of plastic, so be careful!
Spray penetrant / lubricant can help here.
You'll need to gently tug on the bead linkage to help remove the pulley.
YELLOW circles show snap ring and original position. |


|
Power window assembly after cleaning
Power window assembly cleaned.
Try to get as much of the old, caked-on grease as much as possible.
I used an initial soak with WD-40 to loosen the old grease.
Then I used liberal amounts of Super Purple cleaner to wash it clean.
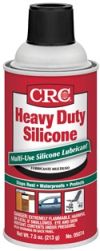
After cleaning, I shot all the moving parts with CRC Heavy Duty Silicone
Lubricant.
This stuff is not as thick as I wanted it, but we'll see how long it lasts.
I would prefer a much thicker silicone grease, but that stuff is expensive
and not easy to find (here in Hawaii).
Try to avoid soaking the electric motor with water.
You can spray the electric motor with the CRC silicone lubricant, as this
stuff does not harm or intefere with electronics; it also disperses water.
Don't forget to clean the length of the bead linkage as much as possible.
Slide the bead linkage forward and back to get access.
Don't worry of the slide bracket pops out - you can pop it back in.
Slide bracket circled in YELLOW.
The other end of the bead linkage cannot get loose due to the spring crimp end.
Don't forget to clean the slide rail where the slide bracket slides up and down in.
It will help to have a brush with at least 1" long bristles for this job.
Slide rail denoted by RED line.
Luckily, this section isn't too dirty.
Shoot all areas that you've cleaned plus all contact and moving parts of the
bead linkage and slide bracket with the CRC silicone spray.
Don't be shy with this stuff - use liberally till it's dripping.
If you're lucky enough to get silicone grease, apply grease just enough for
a light coat; too much grease will cause the stuff to ooze into a mess.
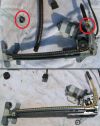
Compared before (TOP) and after (BOTTOM) pics of power window assembly. |
 |
Before and after cleaning close-up of spring crimp end
TOP pic shows spring crimp end with old, caked-on grease.
BOTTOM pic shows spring crimp end after cleaning.
I used liberal soaking in WD-40 - a solvent.
Be careful on using stronger stuff...
I had acetone and aircraft paint stripper available, but I didn't want to
harm the plastic parts.
Take your time cleaning this stuff.
I used a mechanics pick to big out all the grease between the spring coils.
The rest of the time is spent with WD-40 and a toothbrush.
Washed down with Super Purple cleaner and then sprayed with CRC silicone
lubricant spray. |
 |
Pulley reinstalled
Pulley spindle lubed with silicone spray helps here.
Pulley reinstalled with protruded center inward - only goes in one way.
Gentle manueuver the bead linkage around the pulley.
Snap ring reinstalled too.
Pulley and snap ring circled in RED. |
 |
Metal guide cover reinstalled
Metal guide cover reinstalled.
Hole in cover goes on white plastic stud.
White plastic stud circled in RED.
7mm bolt secures other end of metal guide cover.
7mm bolt cicled in YELLOW. |

 |
New guide tube + clamp
Since we're trashing the old vinyl guide tube, we need to replace it with something
that has about 3/4" I.D. and about 24" long.
The old vinyl guide tube was about 18" and too short, so the extra 6" is welcome.
The bead linkage O.D. measures about 5/8".
A 3/4" I.D. hose slips nicely over the fitting on the assembly.
I found this irrigation "flexy PVC" pipe at Home Depot for $2.50 each.
A corresponding hose clamp was also bought at the same time.
If I had the money, I would've went with a semi-rigid Teflon / PFTE hose, but
that stuff is expensive and hard to find.
McMaster-Carr lists this stuff about $10 - $20 a foot!
Just to do both doors would've costed $50+ just for the hose!
At this point in time, there was a seller on eBay selling 3/4" I.D. PFTE hose
for $6 - $7 a foot; I don't how rigid this stuff is, but I didn't want to
take a chance for $30 to do both my doors.
Another option is polyethelyne(PE) tubing.
Again, PE tubing of this size is not that easy to find.
eBay shows a seller in China selling this stuff, but I did not want to chance
it due to questionable dimensions - having to return this stuff would be a
nightmare.
Also, very few places allow you to buy this stuff per foot.
Most vendors have premeasured 100-foot rolls.
We don't need that much! |
 |
New guide tube and clamp installed
Spray spring crimp end liberally with CRC silicone lubricant.
The 3/4" I.D. hose slips nicely onto the fitting.
Secure with clamp.
Do not overtighten clamp, as fitting is partially plastic!
Tighten clamp just enough so that hose does not slip.
I shot more CRC silicone lubricant into the open and and held it facing up.
You will see the CRC silicone lubricant leak out of the clamp area.
Clamp circled in RED. |
 |
Power window assembly reinstalled back in door
Power window assembly has been reinstalled.
As with removal, use the largest hole in the door for access.
Move door linkages out of the way if necessary.
Power window assembly has been already bolted in.
Two TOP 10mm nuts are circled in RED.
Three BOTTOM 10mm bolts are circled in YELLOW.
You can see two white zip ties - circled in GREEN - used to loosely secure
the new guide tube in the door.
Please check window glass clearances before tightening the zip ties down.
Power window motor electrial plug has been plugged back in, circled in BLUE. |
 |
Close up of location of new guide tube in door
Two white zip ties are tightened, circle in RED.
Do not overtighten them, as sharp door edges will cut them off.
Tighten them just enough to secure the guide tube from moving.
Yellow line denotes new path of new guide tube.
Slightly upper angle helps with operation according to Mazda TSB.
Make sure window glass clears the guide tube. |


 |
Reinstall window glass
Run the window bracket up and down to check clearances.
Once everything looks good, it's time to put back the window glass.
(Reusing old pic.)
Adjust the slide bracket so that it's in the middle of the door.
Align the bolt holes through the access holes.
RED circles show slide bracket bolt holes lined up with access holes.
Drop the glass in carefully.
Take your time.
Use gloves to minimize smudges and protect yourself for safety.
I typically drop the glass in from the outside, and tip the front in first.
(Reusing old pic.)
Once the glass is positioned well, slowly position the bottom edge onto the
slide bracket.
Use the white plastic "sleeve" to help - notice it has a lip located above each
bolt hole to keep the glass in place.
(Reusing old pic.)
Tighten the two 10mm bolts just enough to keep the glass from popping off.
Raise and lower the glass several times to make sure it's sliding smoothly
and not interfering with anything.
Once it passing this inspection, raise / lower the glass till you can access
the two 10mm bolts again in the access holes.
Tilt the front of the glass down and raise the back of the glass up - all
while keeping the glass on the bracket without popping it off.
At this point, snug the two 10mm bolts down.
Do not overtighten!
The bracket is plastic and the glass is sandwiched in there.
Overtightening can destroy the plastic and possibly shatter the glass!
Tighten enough just so the glass doesn't slip. |
| |
Recheck clearances and reinstall door panel
One last check...
Run the window up and down to check everything.
Once you're satisfied everything is good, it's time to put back the door panel.
Once the door panel is reinstalled, recheck the window operation again to make
sure the window glass moves up and down smoothly. |


